Digital 3D avatar singing and dancing controlled by users
Click on the central round CLICK ME button to start the music.
The avatar will start playing 10 random movements.
• You can try with the number keys from 1 to 10 that you find lined up on the left side of the keyboard (above the letters) to change the dance movements.
• With the 4 central arrows on the keyboard you can change the position of the avatar.
• With the + and – key found on the numeric keypad to the right of the keyboard, you can zoom in and zoom out on the avatar.
Enjoy! ![]()
How To Make Your 3D NFT Avatar Dance To Music?
Are you a Bored Ape? Maybe you’re a CryptoPunk? No? Maybe a little more Meebit than Genie? Regardless of your flavor of NFT avatars, it’s clear there is a new world emerging around persona-based art. Some of these avatars are already 3D and others require the creativity of a broader community to breathe 3D life into them. No matter what, though, we’re seeing the world of persona-based art pushed to the limits thanks to NFTs.
Today, we’re going to break through the limit and show you how to make your 3D avatars more exciting, more fun, and, hopefully, more viral using Pinata as the backbone for it all. Digital experiences today require the combination of multiple media files. An image is fun, but an image set to audio is an experience. A video with text overlay can change the entire feeling. 3D models are already made up of many different media files. Meshes, textures, shaders, and more. What if we could include animations and audio in one unified experience?
Let’s do exactly that!
Getting Started
You don’t need to know how to code to follow along with this tutorial (#TeamNoCode). But you will need some things to make it all work.
- Download Blender. It’s a free, open-source desktop application that makes working with 3D files and animations easy.
- Sign up for a Mixamo account. Mixamo is an Adobe product that lets you rig 3D models and animate them.
- Get yourself a 3D NFT avatar (this can be pricey, so feel free to just grab a character model from Mixamo or Sketchfab or any other marketplace with creative commons licensing if you’d prefer). I’m going to use an asset from Sketchfab.
- Sign up for a Pinata account.
Regardless of how you ultimately get your 3D asset, you’ll need to determine what your next step should be. We want to rig the model in Mixamo, but to do that, we need to make sure the 3D model is in the appropriate file format.
For the sake of this tutorial, I’m going to use Sketchfab. I’ll be sure to download a model in a format that needs to be converted so that you can follow along with the process.
Getting Our Model
Again, I’ll be using Sketchfab for this, but you can skip this section if you already have a model you’d like to use. Sketchfab has a nice search feature, and there are plenty of models available for download under creative commons licenses (just be sure to attribute the original artist).
Here’s the link I’m using in my search. You can alter this for whatever search parameters you’d like. The best models for this are ones in the t-pose format, but any model that is humanoid and has its limbs free from the body (meaning not attached to other objects and not, say, in their pocket) should work.
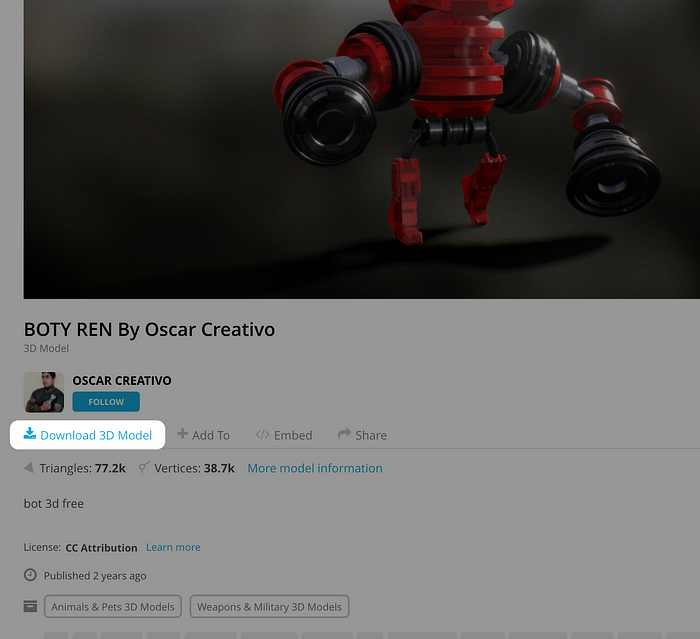
I found a robot that I like and while it’s not in a t-pose, I like the way it looks, so I’ll be using it for my example.
Since Mixamo expects obj and fbx files, I’m going to make sure to download this model in a format it doesn’t expect so that we can walk through the conversion process in Blender. There is a download link on the model. I’ll just click that. Of course, if you want to bypass the conversion step just grab the fbx or obj format and skip to the Mixamo section.
Then, in the modal that pops up, I’ll download the glTF format.
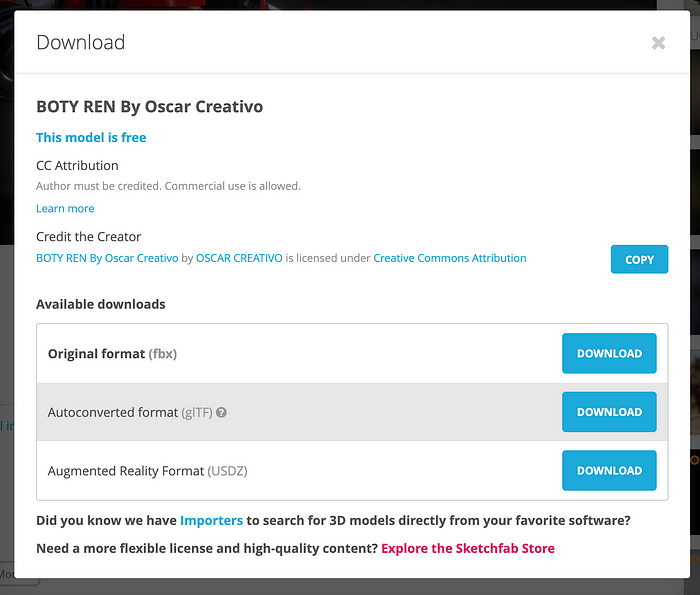
That will download to my computer in a zip file. All I need to do now is unzip it and open Blender.
Converting Files in Blender
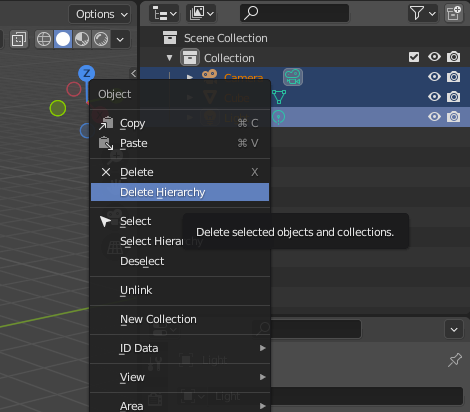
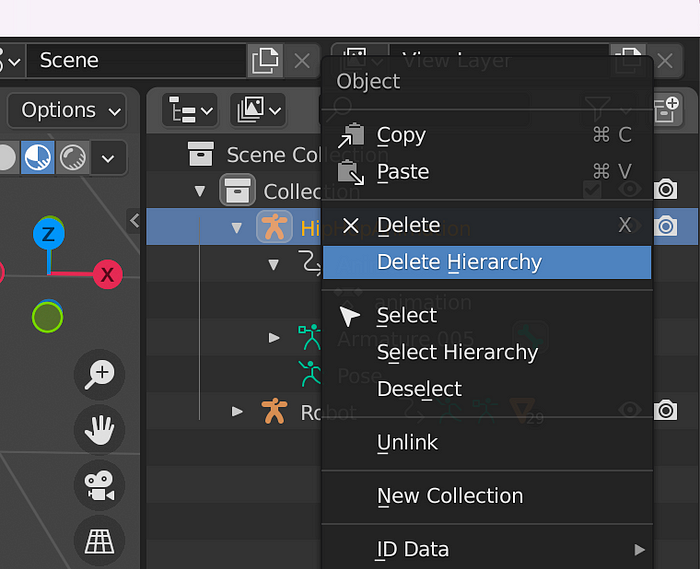
When you first open Blender, an example scene will be created for you. We want to delete the items under the collection in that scene. You can select them all, right-click, then choose Delete Hierarchy.
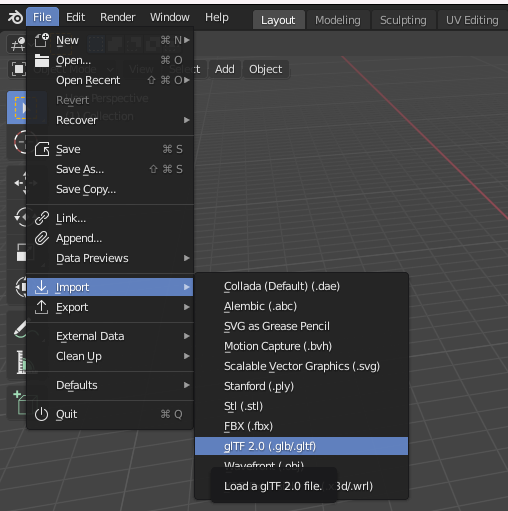
With those example items gone, we can now import our model. Click the File menu, then choose Import. Since I download the glTF format, that’s what I’ll be importing here.
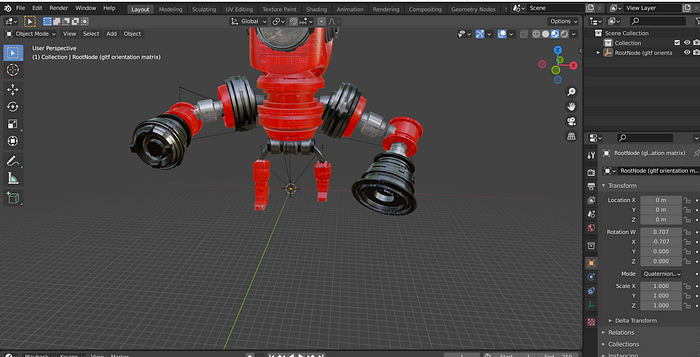
With the model imported, we can experiment with the camera zoom, sizing, and lighting. You don’t have to, but I wanted to make sure the model looked good. So, I zoomed out, and I chose new lighting. This is what I see now:
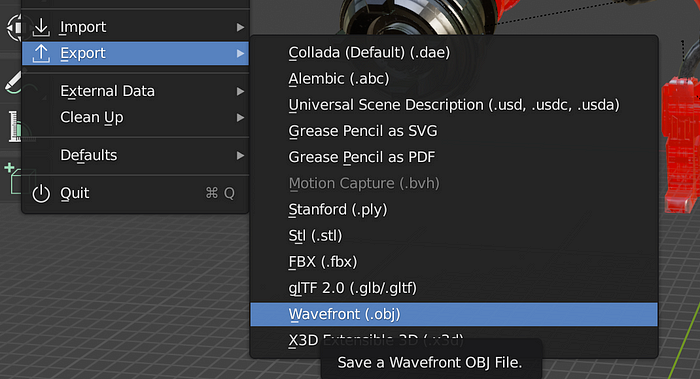
This looks ready to export! We’re going to export the model in obj format very similar to how we imported it. In the File menu, click Export. Choose Wavefront (which is the obj file type):
Make sure you save it somewhere you can find it easily because we’re going to be bringing this guy into Mixamo in just a second. When the export is done, you’ll actually get two files: an obj file and an mtl file. The mtl file is the material that makes our model look nice. To ensure that material is added to Mixamo, we need to select both files and zip them.
Animating In Mixamo
We have taken our 3D model, used Blender to convert it to a file we can use in Mixamo, and now it’s time to add some animation.
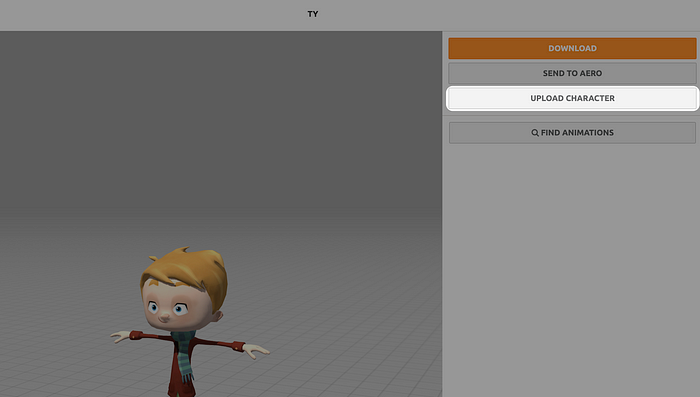
If you haven’t done so already, sign up for an account on Mixamo here. Once you’ve signed up, you should see a screen like this:
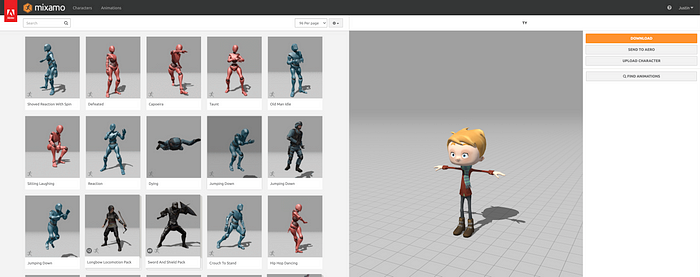
You may or may not have a model showing already in the preview. Either way, we’re going to replace it. All you need to do is click the Upload Character button.
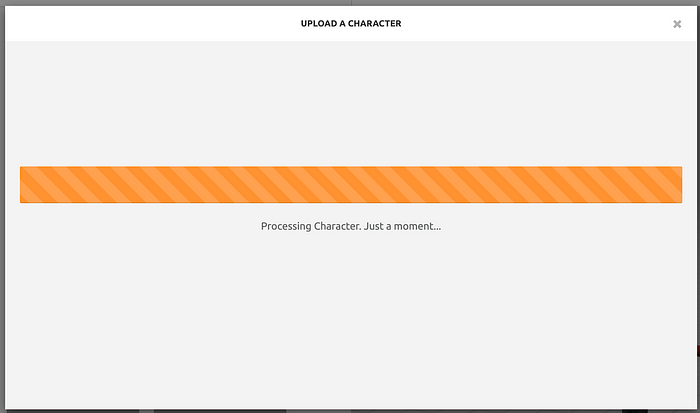
In the modal that opens, you will be able to select a file from your computer. This is where we are going to find the zip file we created of the combined obj model and mtl file. You’ll need to wait for the upload to complete and the processing to complete.
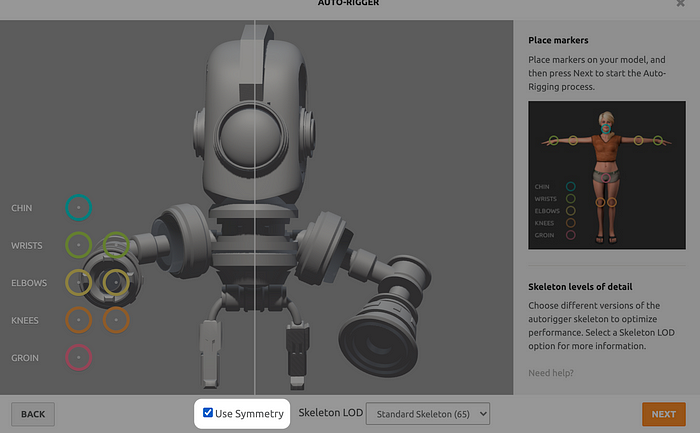
When it’s done, it’ll be time to preview your model and then rig it. Rigging is simply the process of adding joints to your model that can be used for animation purposes. Mixamo has a simple rigging system. You can drag the points onto your model as specified. If your model is not in t-pose, then it’s likely not symmetrical. If that’s the case, uncheck the Use Symmetry checkbox at the bottom.
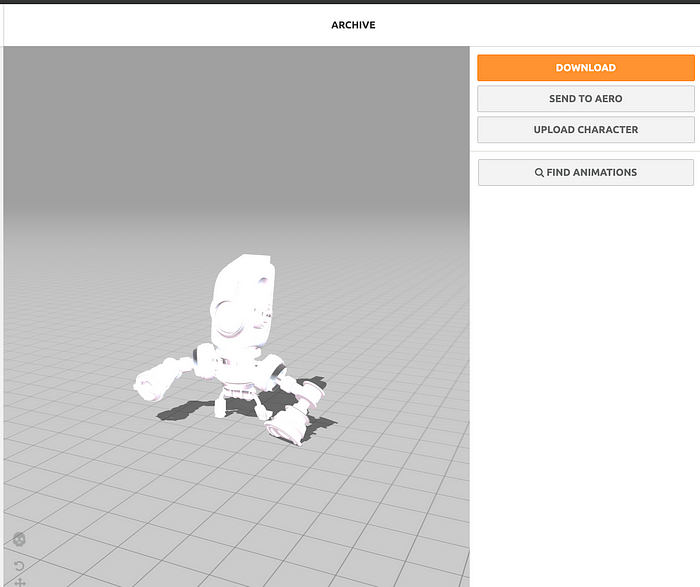
When this process is complete, you’ll see a preview of your model with a basic animation. This should prove that things are working as expected before you click Next and can add your own animation.
But wait!
Before you add an animation, you need to get the rigged model out of Mixamo. You’ll click Download as soon as you see this screen:
Notice, no animations are selected. We need the rigged model so that we can add the animation to it in Blender. Once you’ve downloaded the rigged model (in fbx format), open a new Blender project, click File, then click Import. Choose fbx for your import type and find the model you exported from Mixamo.
Now, put Blender aside. We have some animating to do in Mixamo.
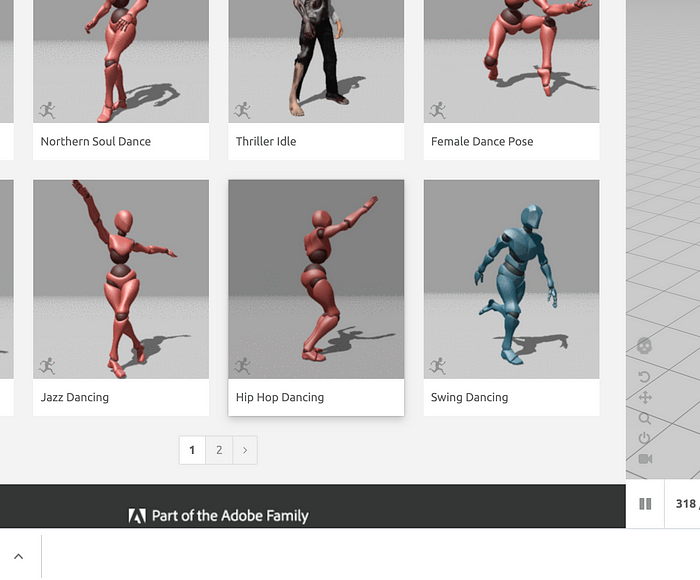
At the top of the Mixamo page, make sure you have the Animations tab checked and click into the search box in the top-left. You can select any available animation type, but I’m going to select Dance.
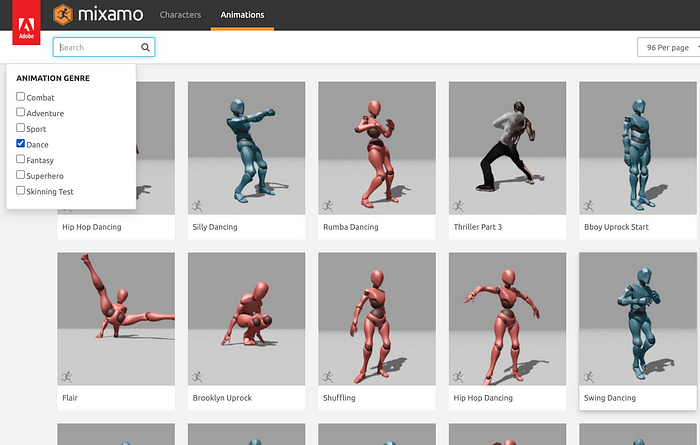
Select an animation you like and it will automatically be applied to your model. Some animations will look better than others depending on your model. So pick the best one for your situation. Because my model has arms that are longer than its body, I wanted to choose an animation where the arms stayed above the head as much as possible. Don’t want those arms going through the floor.
I chose one of the many “Hip Hop Dancing” animations:
When you select your animation, you’ll see it applied immediately to your model. Pretty cool! You’ve gone from a static 3D model to a dynamically animated 3D model.
If you like the animation, you’ll need to get it exported so that we can bring it into Blender.
Quick side note on why we have to do things this way. Mixamo does not allow you to export the fully rigged and animated model. We can export each of these separately and then combine them in Blender for the finished product.
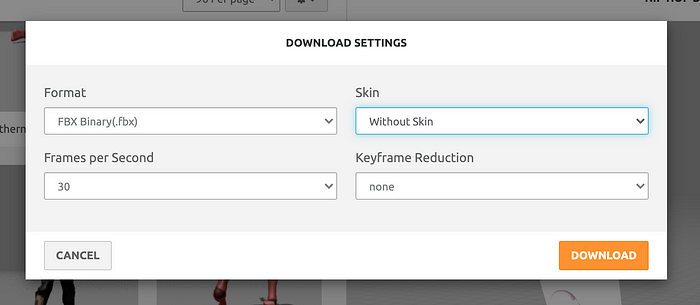
Just like you did before, click the Download button in Mixamo. This time, you’ll see a different set of options. We only want the animation, so choose the Without Skin option:
Now that you have both your animation and your rigged model downloaded, it’s time to do some work in Blender.
Adding Animations in Blender
You previously imported the rigged model into Blender. Now, we need to import the animation. Click File -> Import. Choose fbx again, and then select the animation file you downloaded from Mixamo.
When you do so, you should see a sort of skeleton inside your model.
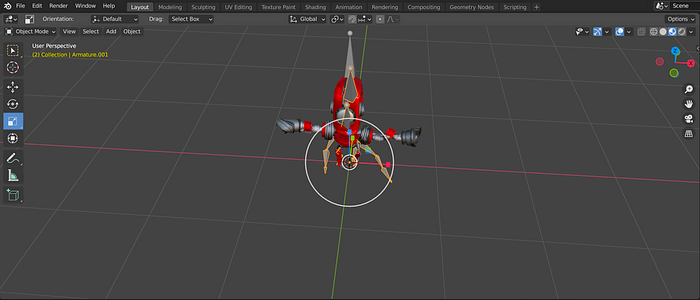
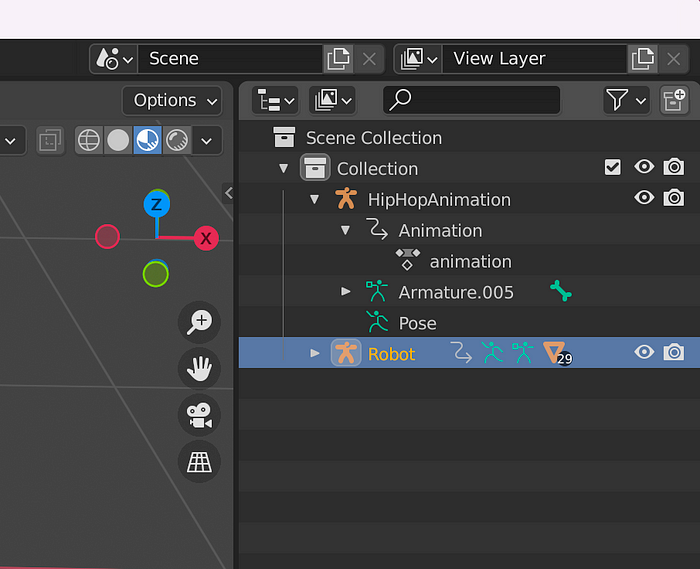
This is your animation. It won’t do much yet, but we’ll fix that. In the right-side panel, click on the model and rename it to make things easier. I just renamed mine to “Robot”.
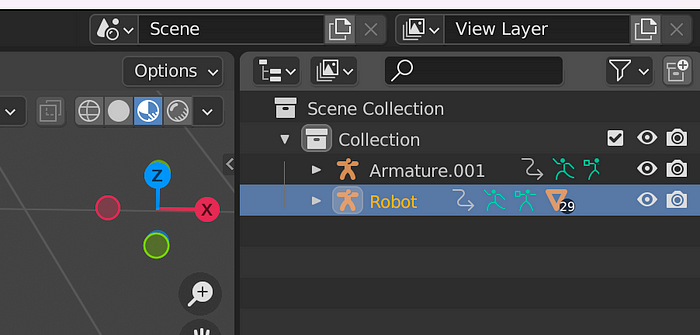
Do the same thing for your animation. Then expand the animation and you’ll see something like this:
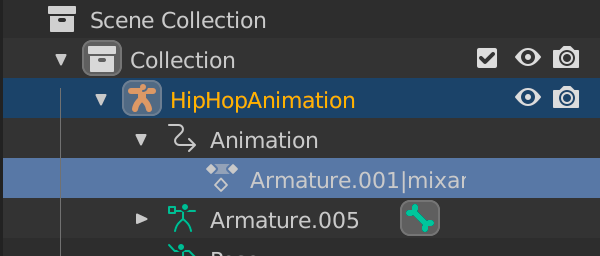
You can change the name of that nested “Armature.001|mixamo…” item to something easier to remember like “animation”.
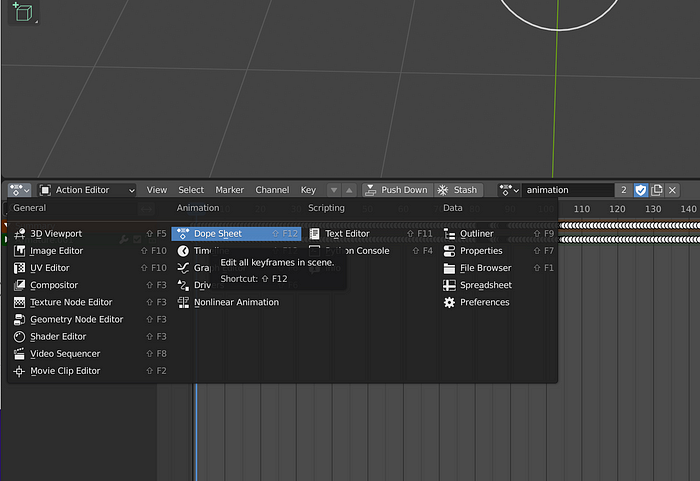
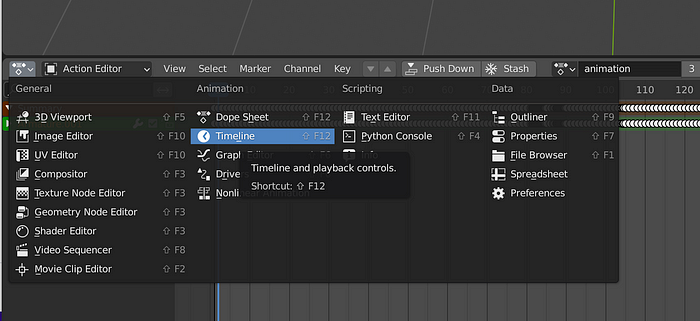
Once you’ve done that, you’ll want to open the Dope Sheet. You can do this by switching your main logic panel editor to Dope Sheet:
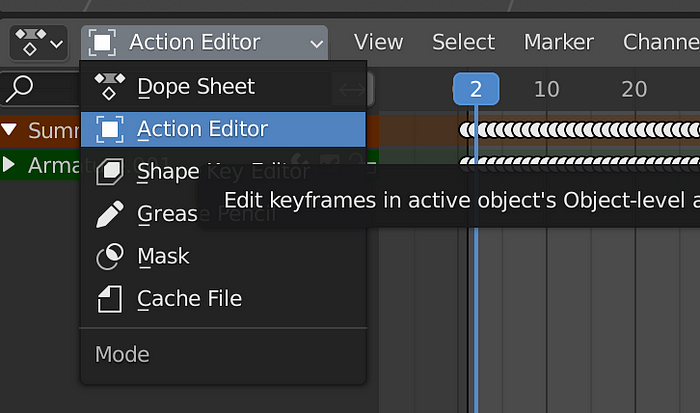
With the Dope Sheet open, you now have extra options. We’re going to change to the Action Editor:
In the right-side panel, click on your model. You’ll know it’s selected when it is highlighted:
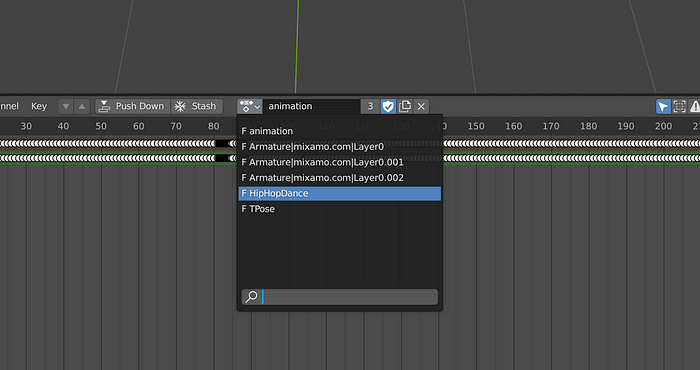
Next, back in the Action Editor, find the animation dropdown and change it to your imported animation (remember you renamed this to make it easier to find):
When you select that, you should see your model’s pose change. That means the animation has been applied to the model. We can verify this by switching out of the Dope Sheet and back into the Timeline.
When you switch, you’ll see a play button. Click that, and your model should now be dancing just like it was in Mixamo!
It might playback a little slow, but don’t worry, that’s not how it will look when we upload it to IPFS and play it through our IPFS Gateway 3D Viewer.
We actually no longer need the animation in our Blender editor window, so you can right-click that then choose Delete Hierarchy:
You’ll be left with just your model. Feel free to save your Blender scene now. When you’ve done that, the last thing we need to do in Blender is export our model.
We are going to export our model in glTF format. Click File -> Export, then click glFT. Give your file a name and save it somewhere easy for you to access.
Bringing Your Model to the Metaverse
Your model came from (in a perfect world) an NFT you purchased on a blockchain. We should use similar technology to store and display our new animated iteration of that model.
We’re going to use Pinata to upload the animated model to IPFS. We’re going to create a dedicated gateway to make sure anyone viewing our model can access it quickly and doesn’t have to wait on the slow load times of public IPFS gateways. And we’re going to use a plugin that is also served through the gateway to display our model.
As an added bonus, we’re going to add some music to the background. When you’ve signed up for your Pinata account, go ahead and upgrade to a paid plan. Trust me, it’s worth it. This can be your home for hosting all your content and distributing it in a way that you own completely. The plan starts at just $20/month.
Once you’ve done this, you’ll now have access to create a dedicated IPFS gateway. Think of this as your own personal media platform. We’ve got a great guide on setting up your dedicated gateway here:
How to Set Up a Dedicated Gateway
If you want to brand the gateway with your own custom domain, you can do that too. Just follow this guide:
How to Set Up a Custom Domain on Your Gateway
Once you’ve done this, you have just a few more steps before your animated 3D NFT avatar is live and ready to share. Head over to the Pin Manager page and upload the file glTF file you exported from Blender.

Once you’ve done that, it’s time to find some music to set the dance to. We don’t want to infringe on any copyrights, so let’s find some public domain music. FreePD is a great place to find this music. Once you’ve found some music you like, download it. Then, upload it to your Pinata account the same way you uploaded the model.
Ok, so you’ve uploaded the model and you’ve uploaded the music. Now, you just need to make use of a plugin we built to help display animated models through an IPFS gateway. This will be easy.
On your Pin Manager page, click Upload, then choose CID:
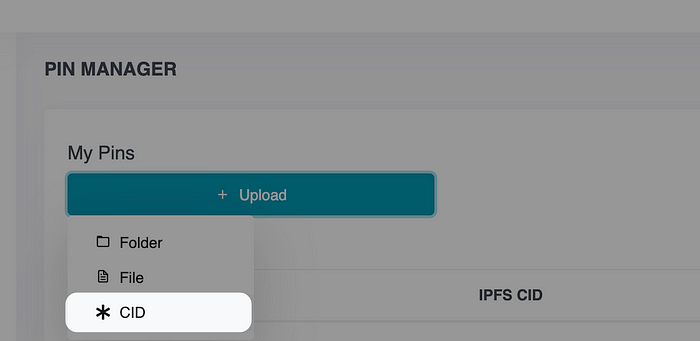
You’ll be asked to provide a CID that’s on the IPFS network. Pinata will find the associated file and pin it to your account. Here is the CID to use:
QmXypjaBUNuCAAt2eqEhNCGHq9B57eCZV6sqEEBYjFVefn
Give it a name that you’ll remember. After you do this, you may need to refresh the page a few times before it shows up. Pinata will find it on the network quickly because this is an official plugin that we built and pinned.
When the file shows up in your Pin Manager, click the name to open it up through your gateway. You’ll notice that it loads with an error. That’s because it doesn’t know what 3D model to load.
Let’s fix that!
On the page you just opened, go to the end of the URL and add the following:
?CID=THE_CID_FOR_YOUR_MODEL&audio=THE_CID_FOR_YOUR_MUSIC
You can get THE_CID_FOR_YOUR_MODEL and THE_CID_FOR_YOUR_MUSIC from your Pin Manager. Click the copy button next to each one and add it to the URL. When you do so and reload the page, your model should load and you will either hear the music play immediately, or you will see a play button in the top-right. Click that, and you’ll have a dancing 3D model with audio on the background.
Here’s my robot:
Pinata IPFS 3D Loader
Fast and lightweight glTF 2.0 scene viewer powered by the PlayCanvas WebGL engine and Pinata
The lighting might not be perfect, but you can expand the window on the left and make adjustments to lighting and other things.
Wrapping Up
This is proof of the possible. NFTs are changing the way we think about experiences, and we need technology to keep up, especially in Web3. I hope that through this tutorial you learned some novel ways to enhance your NFTs, use IPFS, and extend what’s possible thanks to dedicated gateways and Pinata. Now, get to creating.
Happy pinning and creating!
Written by Justin Hunter
https://medium.com/pinata/how-to-make-your-3d-nft-avatar-dance-to-music-38bcd1439cf4